Maintaining Your RV Battery: Tips And Tricks
by Kevin Fairbanks • Updated: January 21, 2024
Get expert tips and tricks for RV battery maintenance to ensure long-lasting power on the road. Discover how to keep your battery in top shape and click here for essential advice!
Are you ready to hit the open road in your trusty RV? Well, before you rev up the engine and start your adventure, let’s talk about something that might not be as exciting, but is oh-so-important: maintaining your RV battery.
Yes, I know, it’s not the most thrilling topic, but trust me, a well-maintained battery can make all the difference in your journey. So, buckle up and get ready for some tips and tricks to keep your RV battery in tip-top shape!
Now, I know what you’re thinking: "Why do I need to worry about my RV battery? Can’t I just plug it in and forget about it?" Well, my fellow road warrior, unfortunately, it’s not that simple.
RV batteries come in different types, and each has specific maintenance needs. In this article, we’ll dive into the world of RV battery types and explore the best maintenance practices for each.
From deep cycle batteries to lithium-ion ones, we’ve got you covered. So, get ready to become the battery guru of the RV world!
Key Takeaways
- Perform regular maintenance and care to extend the lifespan of your RV battery.
- Keep the battery clean and protected from excessive heat to preserve energy.
- Regularly drive your RV to charge the battery and keep it in top shape.
- Implement these tips and tricks to ensure the longevity and efficiency of your RV battery.
Understanding RV Battery Types and Maintenance Needs
Now that we’ve got a handle on our RV’s electrical system, let’s dive into understanding the different types of batteries it may use and their unique maintenance requirements.
First up, we have the flooded lead-acid battery. Don’t let the name fool you, this battery doesn’t enjoy long walks on the beach or candlelit dinners. It’s a tough cookie that requires a little extra TLC. These batteries need to be regularly checked for water levels and topped off with distilled water, just like a plant that’s constantly thirsty.
And let me tell you, you don’t want to mess with these batteries when they’re thirsty. They can get real cranky and may even start spewing acid like a volcano. So, make sure you keep an eye on their water levels and keep them hydrated.
Next, we have the AGM battery, which stands for Absorbent Glass Mat, but I like to think of it as the "Always Good Mate" battery because it’s always there for you when you need it. These batteries are sealed tight, so you don’t have to worry about topping off their water levels. They’re like the friend who never asks for anything, but is always ready to lend a helping hand.
However, they do require a little more attention when it comes to charging. You can’t just plug them in and forget about them. They need a slow and steady charge, like a turtle crossing the finish line. So, take the time to charge them properly and they’ll be your faithful companion for years to come.
In conclusion, understanding the different types of batteries your RV may use and their unique maintenance needs is crucial for keeping your power supply running smoothly. Whether you’re dealing with a thirsty flooded lead-acid battery or a low-maintenance AGM battery, remember to check their water levels or charge them properly.
And hey, if you ever find yourself singing "I Will Always Love You" to your RV batteries, just remember that a little maintenance can go a long way.
Proper Charging and Discharging Techniques
To ensure optimal performance and longevity, it’s important to understand the proper techniques for charging and discharging your RV battery. Let’s dive into the electrifying world of power management!
When it comes to charging your battery, remember to be patient. Just like waiting for your morning coffee to brew, good things come to those who wait. Avoid the temptation to rush the charging process by using a high voltage charger or leaving it plugged in for an extended period. This can lead to overcharging and potentially damage your battery. Instead, opt for a smart charger that automatically adjusts the charging rate based on the battery’s needs. It’s like having a personal trainer for your battery, ensuring it gets just the right amount of juice to stay fit and healthy.
Now, let’s talk about discharging your battery. Just like binge-watching your favorite TV show, it’s all about balance. You don’t want to drain your battery completely, leaving you stranded with a dead power source. On the other hand, you also don’t want to leave it partially discharged, like a forgotten bag of chips at the back of your pantry. This can lead to sulfation, a buildup of lead sulfate crystals that can reduce your battery’s capacity. So, be mindful of finding that sweet spot between fully charged and almost empty. It’s like finding the perfect snack portion – not too much, not too little, just right.
Remember, charging and discharging your RV battery is a science and an art. By following these proper techniques, you’ll keep your battery performing at its peak and ensure it stays charged up for all your adventures.
So, embrace the power of knowledge and let your battery shine bright like a diamond!
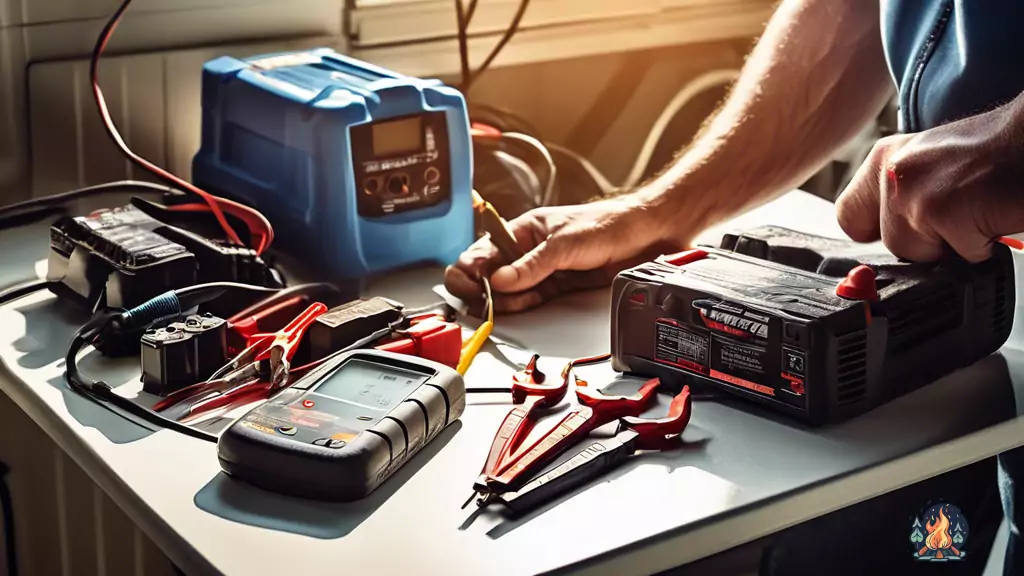
Regular Inspection and Cleaning of Battery Connections
Make sure you regularly inspect and clean the connections on your RV battery to ensure its optimal performance. Neglecting this step can lead to poor electrical connections, which can affect the overall functionality of your battery.
Here are four important reasons why you should make this a priority:
- Prevent corrosion: Battery connections can accumulate corrosion over time, which can hinder the flow of electricity. By regularly inspecting and cleaning the connections, you can remove any buildup and prevent corrosion from affecting the battery’s performance.
- Ensure proper conductivity: Clean connections ensure a good electrical connection between the battery and your RV’s electrical system. This ensures that power is efficiently transferred and that your appliances and systems receive the necessary voltage to operate effectively.
- Extend battery life: Dirty connections can cause your battery to work harder, leading to a shorter lifespan. By cleaning and maintaining the connections, you can help extend the overall life of your RV battery and save money in the long run.
- Avoid unexpected issues: Loose or corroded connections can result in intermittent electrical problems or even complete power failures. Regularly inspecting and cleaning the connections can help you identify and fix any issues before they become major problems, saving you from unexpected headaches during your travels.
So, make it a habit to inspect and clean your RV battery connections regularly. It’s a small task that can make a big difference in the performance and longevity of your battery.
Plus, it’s an opportunity to get up close and personal with your RV’s electrical system, which can be surprisingly satisfying for those with a hidden (or not-so-hidden) desire for a little DIY adventure!
Implementing Energy Conservation Measures
By implementing energy conservation measures, you can significantly extend the lifespan of your RV battery and ensure a continuous power supply during your travels. Let’s face it, nobody wants to be stuck in the middle of nowhere with a dead battery. So, here are some tips and tricks to help you conserve energy and keep your battery charged for longer.
| Energy Conservation Measures | Benefits |
|---|---|
| Turn off lights when not in use | Saves energy and prevents battery drain |
| Use LED lights | LED lights are more energy-efficient than traditional bulbs |
| Optimize your heating and cooling systems | Set the temperature to a comfortable level, not too hot or too cold |
| Limit the use of power-hungry appliances | Avoid excessive use of appliances that consume a lot of power, like hair dryers or electric heaters |
Now, I know what you’re thinking. "But I can’t live without my hair dryer!" Well, I’m not saying you have to give up all the luxuries of modern life, but being mindful of your energy usage can go a long way in preserving your battery. So, next time you’re blow-drying your hair, just remember that every minute you spend blasting hot air is a minute closer to a dead battery. Trust me, you don’t want to be stuck with a bad hair day AND a dead battery. So, conserve energy, keep your battery happy, and enjoy your travels without any power-related mishaps!
Extending the Lifespan of Your RV Battery
Maximizing the lifespan of your RV battery is crucial for uninterrupted adventures on the road. After all, you don’t want your battery to die on you in the middle of nowhere, leaving you stranded with nothing but your own wit and a bag of marshmallows.
Luckily, there are a few tricks you can employ to extend the life of your battery and avoid such sticky situations. So, grab your marshmallows (just in case) and let’s dive into these tips:
- Take it easy on the power-hungry appliances: Your RV battery is a tough cookie, but it does have its limits. So, try to limit the use of power-hungry appliances like air conditioners, microwaves, and hairdryers. Instead, opt for energy-efficient alternatives or simply use them sparingly. Your battery will thank you for it.
- Keep it cool, baby: Just like you, your RV battery prefers to stay cool. So, make sure to park in the shade whenever possible to prevent excessive heat from draining your battery’s energy. Plus, it’ll give you a nice spot to lounge and enjoy a cold beverage while your battery stays nice and cool.
- Give it some exercise: Your battery needs a little workout every now and then to stay in top shape. So, make sure to take your RV out for a spin regularly. Not only will this give your battery a chance to charge up, but it’ll also give you an excuse to explore new places and have some fun. Talk about killing two birds with one stone!
With these tips in your pocket, you’ll be well-equipped to extend the lifespan of your RV battery and enjoy uninterrupted adventures on the road. Just remember, a happy battery means a happy camper, so take good care of it and it’ll take good care of you.
Safe travels, my friend!
Frequently Asked Questions
How often should I check the water levels in my RV battery?
You should check the water levels in your RV battery at least once a month to ensure it’s not parched like a desert. Just like you need water to survive, so does your battery! Stay hydrated, my friend!
Can I use a regular car battery charger to charge my RV battery?
Yes, you can use a regular car battery charger to charge your RV battery. But hold your horses, my friend! There’s a catch. Stay tuned to find out what it is. It’s gonna be electrifying!
What should I do if my RV battery is not holding a charge?
If your RV battery isn’t holding a charge, don’t panic! First, check for any loose connections or corrosion. If that’s not the issue, it’s time to play detective and test the battery’s voltage. Sherlock Holmes would be proud!
Are there any specific safety precautions I should take when working with RV batteries?
When working with RV batteries, safety is key! Always wear gloves and safety goggles, and make sure to disconnect the battery before starting any maintenance. Oh, and don’t lick the battery. Trust me, it’s not a good idea.
How long does an RV battery typically last before it needs to be replaced?
RV batteries typically have a lifespan of around 3-5 years before they need to bid farewell to the open road. But fear not, for there are plenty of ways to keep your battery going strong!

Hi, I’m Kevin, a lifelong camping enthusiast and the voice behind Campfire Discoveries. From tent to RV to cabin camping, I’ve explored it all. Join me as we share stories and tips around the campfire, deepening our connection with the great outdoors.
Keep Reading
-
Keep The Mosquitoes At Bay With Camping Mosquito Repellent
Say goodbye to pesky mosquitoes during your camping trip with the best camping mosquito repellents! Keep those bugs at bay and enjoy the great outdoors in peace. Click here to find out more!
-
Delicious And Healthy RV Recipes To Keep You Energized
Looking for delicious and healthy RV recipes? Stay energized on the road with these mouthwatering meals. Don’t miss out – click here for tasty treats to fuel your adventures!
-
Brew The Perfect Cup With A Camping Coffee Maker
Unleash the ultimate camping coffee maker guide to brew the perfect cup outdoors! Start your day with fresh, delicious coffee – click now and elevate your camping experience.